
When I was at my local 99 Cents Only store, I picked up this gray-green shirt.They had 5 million of them but only in size 2-4T. What's funny is they frequently have colored tees but all in the same size. Like, they had a royal blue, only in size 6.
Other stuff you might need, that I already had (that's why it was only $1 for me: after I've had stuff a couple of years I call it free)
Freezer paper
X-acto knife
Sharpie
Acryilic Paint
Brushes
Cool Stencils

Spray Paint Stencils
Live Journal's Stencil Swap
Stencil Punks
There are some cute kid ones on Ottobre's website and you can also use cheap plastic stencils for small things or baby items.
Put the freezer paper shiny-side-down over your printed stencil and trace with a sharpie.This part is just dumb labor and like to do several at once in front of my favorite tv show.

Use the X-acto knife to cut out the design from the freezer paper very carefully.

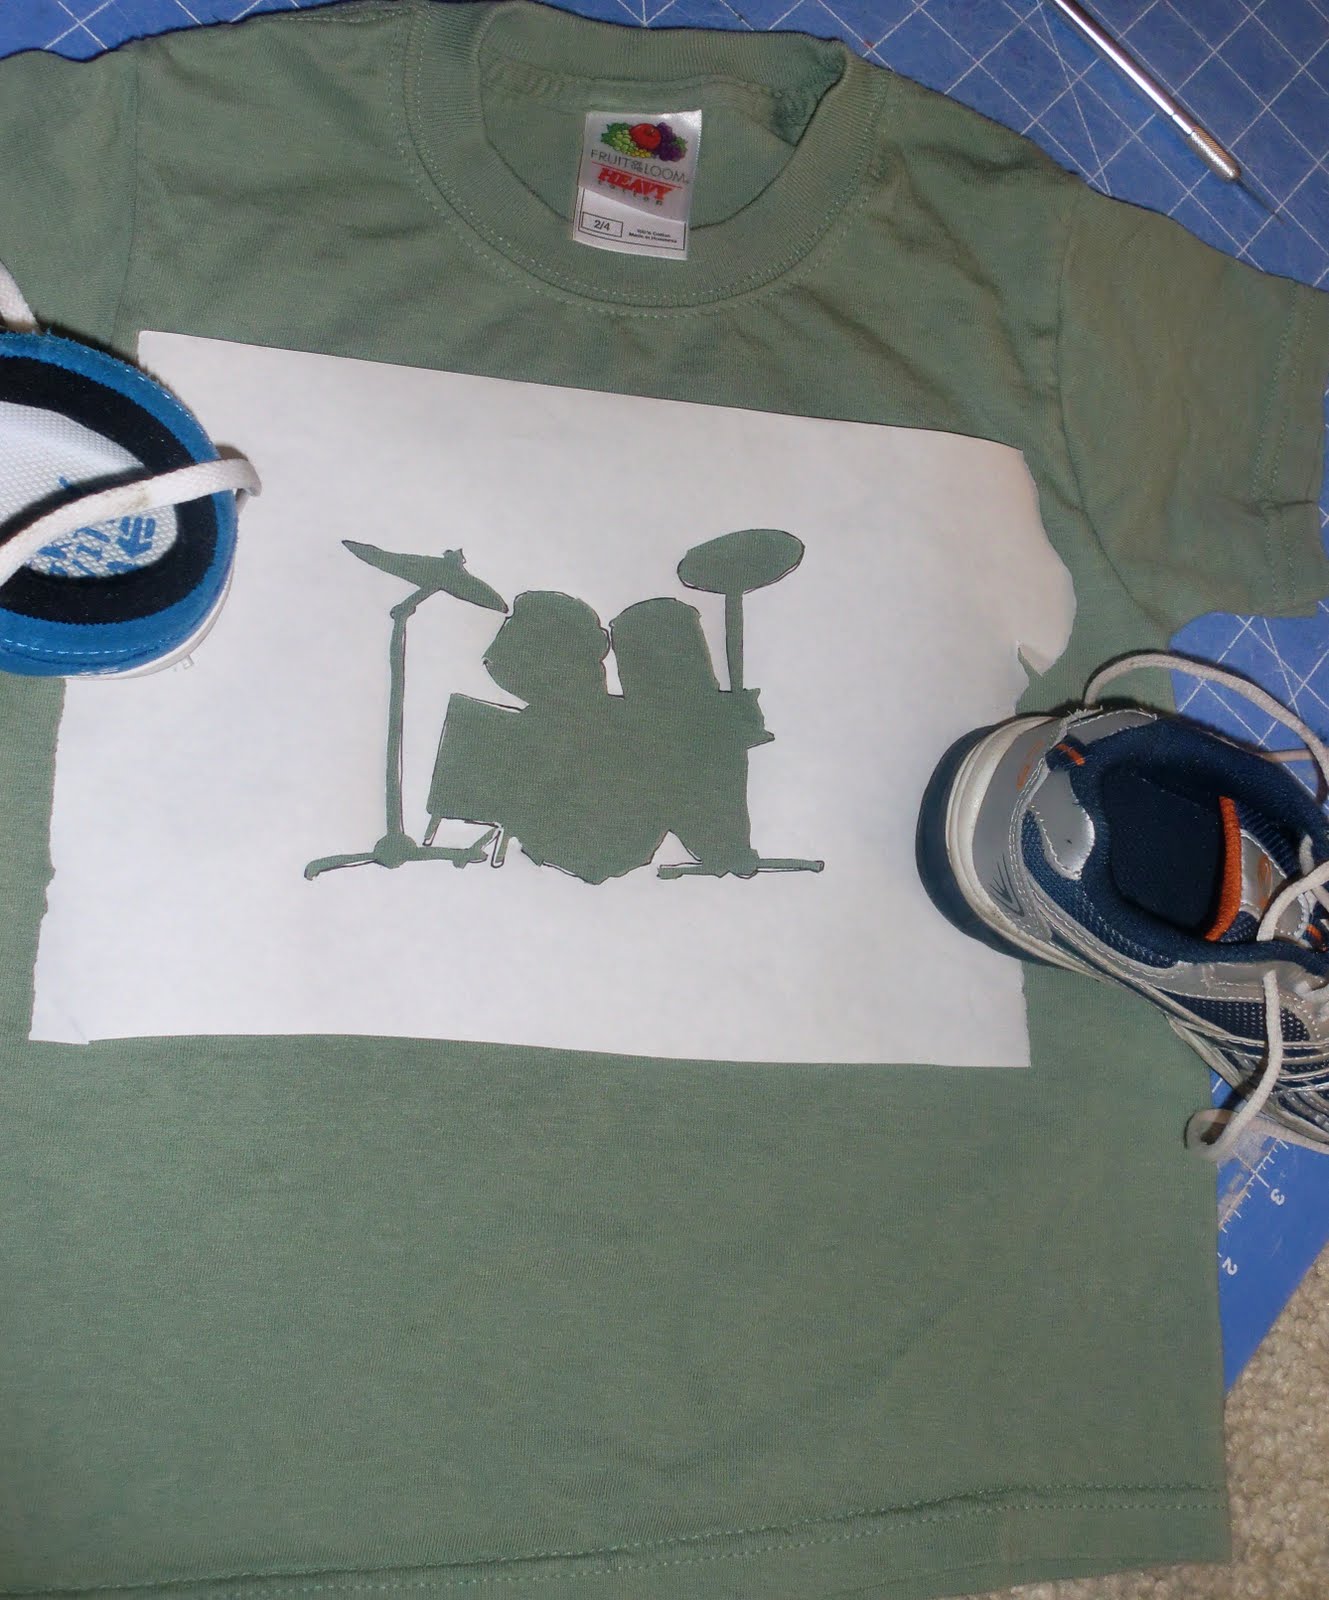
Using a hot iron with no steam, iron the freezer paper down in the position you want. I press and hold for a count of 5 in several spots being mindful that the tiny edges and details need to be firmly adhered to the shirt for clean edge when painting.


Find a piece of cardboard big enough to fit inside your tee shirt.

Pin the shirt to the cardboard so it doesn't move when you're painting.

Add your paint to a tray or paper plate. I used plain acrylic craft paint. I used to add fabric medium but experienced no difference in the appearance or longevity of the painted area. Really, every time I spill this crap on my clothes it NEVER comes out. NEVER. It's liquid plastic: once it embeds itself in the fibers, it becomes one with the fabric. Both horrid and wonderful, all at once. I wanted a color I didn't have so I mixed a bit. I need a gold (yellow-orange) and all I had was a bright yellow and plenty of red.

I start off by dabbing, going around all the edges and filling in the small areas.


Put the shirt on your kid who has been asking about the "dwums shirt" for two days.

Go make a shirt! My kids have made these (the painting part) after I've cut out and iron-on a stencil. If you're new to using an X-acto knife, choose a super easy shape, like a heart or one letter, then move on to something trickier. Anyone could do this and it's a fun way to personalize an inexpensive tee!
3 comments:
I haven't tried myself, as I have no ink in my printer at home so I print off stencils at work (shhhh), BUT, I've been told you can print directly onto the freezer paper to save the tracing step. [I'm pretty sure that was a run-on, huh?]
very cool! thanks :)
I bet you can print on the freezer paper. I sort of wondered that but I already had a printed out design..lol. ill try that next time.
Post a Comment