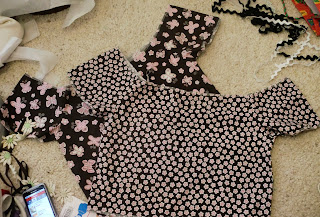
Aldous was happy to model this baby dress for me, altho, it's a top on someone this big. Featured is the free baby peasant top/dress from HERE. It's easy enough for a beginner to sew, and I'll explain an easy technique for gathering the neckline and sleeves.
Print out the pattern. Sew the sleeves onto the bodice, then sew the side seams. The way this pattern says to construct the sleeves is silly, and doesn't make things any easier for the way we're going to do it. If you want to do it their way, ignore all instructions for casings and elastics, etc. I finished my edges with the serger.
See? If you want to fold over twice, then hem, that's fine, too. I folded over once.
Here is a finished top over an unfinished one.
Fold over and hem, however you want to. DO NOT make a wide hem at the neck...everywhere else doesn't matter.
Here's my bobbin, all ready with elastic thread. Yay!! I used Gutterman this time, but Stretchrite is good, too. I don't really have a preference between the two, altho I've heard that whatever Jo Ann Fabrics has now is not that great. I get mine from Atlanta Thread Company, now that Jo Ann no longer has Stretchrite. My friend Michelle over at Crafty Asian Girl did a review of different elastic threads.
I wind my elastic thread on the bobbin winder, just like ordinary thread.
Then, into the bobbin compartment, just like ordinary thread. Do NOT use your thread cutter for this, tho, if you have on your machine. It makes too short of a tail. Clip a long tail with scissors, so the end doesn't jump back into the bobbin compartment. Nothing bad will happen, you'll just have to pull out a length again, but it's a waste of time you can avoid. ;)
When I'm doing several rows of shirring/gathering with this thread, I go in a spiral.I'll explain this more as we progress. For a neckline, I sew right on the line I hemmed, if I can. Otherwise, you'll get a bit of a ruffle effect that's annoying to wear, in my opinion. If you LIKE a ruffle-like edge, start farther down.
Oh look! Here's where I started! So, I gradually move to the left and pass it right by, thus starting the spiral. Just keep on sewing! I like to use the presser foot as a guide to the width of the space between the rows. For kids, I do half the width of the presser foot, but for adults, about a half inch.
And a third row is a-coming! again, gradually move left of the last row, and keep going!!
I only need three rows for a neckline on a child's top. Really, not many more are needed for an adult neckline either, after that it's just decoration. When you come to where you started and are ready to stop, put the needle down.
With the needle down, lift the presser foot and pivot, and sew up to the first line you sewed, back space back, then back up. Lift, remove the garment, and cut your threads, leaving a long tail of elastic both at your machine and on your garment.
See the long elastic threads? Tie these together, then trim close.
See how nice and neat? For the most part, the elastic is secure from the pivoting and the back-stitching, but it never hurts to be thorough!
For the sleeves, just sew one row around, back -stitch at the end, tie and trim the ends. Super simple. For adults, I like to go around twice, but once is sufficient for small children and babies.
Here it is all sewn. It will look too big still at this point. When I first started using this thread I used to totally freak out here that my thread didn't gather enough!
No problem! Steam with your iron or steam and it will shrink right up!!
Now it's the same size as the first one!
It's gathered much more tightly now.
And, here are the three pretty dresses for Rosemary! Altho, they will fit Audrey, too. I modeled them on Aldous to see. I made a gathered top this way for myself and it was the size to fit a 3 year old as a dress! Fitting just isn't an issue with these! I really think for this pattern, you would just need to add length to the sleeves and bottom to fit for up to a 5 y/o before having to widen both pieces.
Here's Aldous modeling the dress for his almost 8 month old niece. He's a good sport! Oh, except for this face, which is his new picture face. **sigh** I remember William's "cheeseface" not fondly.
Aldous' cheeseface.
Happy sewing!


2 comments:
So cute!!! I love peasant style tops and dresses.
I actually made an apron out of that same pink flowered fabric, I also have it in blue.
balenciaga shoes
balenciaga sneakers
balenciaga shoes
air max 2018
hermes
air jordan
coach outlet
vapormax
michael kors outlet
kobe 11
Post a Comment